Brotato beginner guide: weapons, shop rerolls and survival stats
You do not need to memorize a winning loadout for your first Brotato runs. After each wave, ask what made it dangerous and what your next materials purchase could improve. Default automatic attacks let you concentrate on movement; the shop turns those observations into a build. This guide covers early solo attempts in the PC base game's normal mode, not DLC, Endless or a fixed Danger 5 strategy.
Read the character before choosing damage upgrades
Before starting, read bonuses and restrictions together. Available weapons, stat modifiers and special rules can change the shopping plan. Most characters can carry six weapons, but there are exceptions. Before taking a cheap weapon, check that it fits this character rather than copying a loadout that worked for someone else.
Check the damage scaling on each weapon's panel. Melee, Ranged and Elemental Damage do not strengthen every weapon unconditionally; use the displayed scaling to decide. Sharing useful stats across several weapons can make early experiments easier to understand. This is a learning suggestion, not a ban on mixed builds. Unusual weapons and Engineering setups deserve especially careful descriptions.
Find a useful purchase before paying to reroll
Give each purchase a job: improve current weapons, make the next wave safer or support later income. Read its penalties too; even a bargain can create a weakness. Locking preserves an offer you cannot yet afford or want to reconsider. Rerolls cost materials, and consecutive rerolls within the same shop become more expensive.
Set a stopping condition. Suppose you have 40 materials and see a useful upgrade costing 30. If you intend to buy it, total reroll spending cannot exceed 10, or you will no longer afford it even if it remains available. These are hypothetical budget figures, not item prices. Combining also has a cost: two identical weapons of the same tier, below the maximum tier, become one of a higher tier, reducing the count by one. Compare the improvement with losing an attack source.
Separate poor clearing, low durability and weak recovery
If enemies keep accumulating, check weapon count, damage scaling and attack frequency. If you clear effectively but fall after a few hits, investigate maximum health and Armor. If you repeatedly spend the latter part of a wave nearly dead, examine recovery. A rarer stat option is not automatically a solution to the problem you just experienced.
HP Regeneration restores health over time, Life Steal relies on attack hits triggering it, and Dodge does not succeed every time. Match them to your weapons and character restrictions. Leave yourself room to exit a crowd, changing direction before the opening closes. Diving into dense enemies for a small pile of materials can cost you the opportunity to visit the next shop at all.
Choose by what you enjoy
| Game | Choose it for | Consider before choosing |
|---|---|---|
| Brotato | For learning one character and one shopping decision at a time | This routine cannot guarantee an item offer or a winning purchase order |
Brotato
For learning one character and one shopping decision at a time
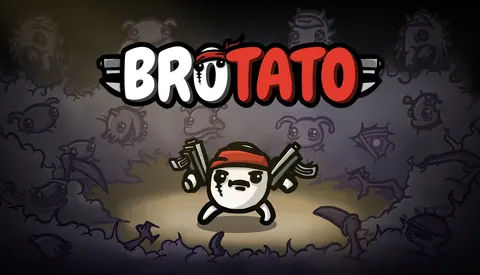
Choose a character whose description you understand and a weapon direction. After the first wave, describe a weakness in one sentence and look for an upgrade or purchase that addresses it. If the previous wave was already safe, compare income options. Economic investment needs later waves to pay off; it does not automatically outrank survival now.
During the next wave, check the result: are enemies disappearing faster, are you recovering after hits, or did the spending change very little? If it had little effect, verify that the purchase affects the damage source you actually use. Testing one judgment at a time makes improvement and failure easier to understand.
Turn a defeat into one practical adjustment
After losing, distinguish being surrounded, insufficient clearing, poor recovery and rerolls consuming an upgrade budget. Change one decision next time. Official accessibility options let you adjust enemy health, damage and speed. Use them if execution pressure blocks learning, then adjust as useful rather than measuring yourself against someone else's pace.
Frequently asked questions
Should I combine weapons immediately after filling six slots?
Not necessarily. Check the character's slot rules, then compare the resulting damage, effects and weapon count. Combining two held weapons without a replacement removes one attack source; having a suitable replacement in the shop changes the decision. Evaluate quality in the context of the whole loadout.
Should I restart if a guide's weapon does not appear?
First consider whether the current offers can improve what you already have. Different items can serve the same purpose, while chasing a specific name can exhaust your materials. Change direction because you understand the character's constraints and the plan's weaknesses, not simply because a familiar item is missing.
Sources and scope
Based on the sources below, checked on the dates shown; recommendations about fit are editorial judgments, not a hands-on play report or a difficulty measurement. This guide covers the named games, not their sequels. See each game page for review evidence.
- Blobfish — Brotato ↗Checked
- Brotato Wiki (community) — Shop ↗Checked
- Brotato Wiki (community) — Weapons ↗Checked
- Brotato Wiki (community) — Stats ↗Checked