Monster Train beginner guide: floors, capacity and upgrades
Starting Monster Train? Before memorizing a winning deck, answer three questions each turn: which floor can handle the enemies, who dies first, and what will keep climbing? This guide covers the original PC base game's standard single-player loop. It connects positioning, resources and upgrades so you can read a fight. It does not cover Monster Train 2 or require The Last Divinity.
Check floors and formation before ending the turn
You can deploy units on three combat floors, with the Pyre above them to protect. Ordinary enemies enter at the bottom and survivors climb after combat. Reaching the Pyre threatens your last defense. A leak on one floor is not necessarily an immediate defeat, but taking no damage yet does not mean that wave is solved.
Read each floor's combat preview and enemy abilities before committing cards. The front unit normally takes ordinary attacks first, allowing damage dealers behind it to work, but abilities such as Sweep change that protection. Do not automatically pile every high-health unit at the front: check whether essential attackers survive and whether a new placement uses space you still need.
An unplayable card can expose three different shortages
Ember, floor capacity and the cards drawn are separate resources. Ember pays for plays; capacity limits the space used by normal unit deployment; draw determines which tools reach your hand. For example, a floor with three spaces left cannot directly accept a size-four unit just because you can pay for it. This illustration is not a rule covering every movement effect.
Name the problem before choosing an upgrade. If useful cards sit unaffordable in hand, consider Ember support or cost reduction. If Ember is spare but useful cards are missing, examine draw and deck composition. If your formation lacks room, consider capacity. A strong card alone is not a reason to draft it, and Pyre health is not your per-turn spending budget.
Clearing waves and surviving Relentless are different tests
Ordinary waves move upward; when a boss enters Relentless, combat repeats on its current floor until one side is defeated. A boss that destroys your defense can continue upward. Check damage in one exchange separately from how many exchanges your units can survive. Reliable spell-based wave clearing does not by itself settle the boss fight.
As a learning exercise, build a cooperating core on one floor, then consider how other floors can catch leaks, instead of dividing upgrades equally just to fill all three. This is a starting point, not a universal optimal formation. Separate frontline survival, sustained damage and enemies escaping your core: each problem calls for a different repair, and another large unit may solve none of them.
Use routes and upgrades to address a demonstrated gap
The official description lists recruitment, card upgrades, champion improvements, passive bonuses and card duplication along your route. Inspect your current deck first. A unit-based defense lacking strength suggests looking at unit upgrades; an essential spell you cannot afford suggests an appropriate spell upgrade. Before duplicating, check whether a second copy fits, is affordable and actually fixes something.
Optional trials add danger in return for rewards. Read how a trial changes enemies and ask whether your current formation can handle it; accepting every trial is unnecessary. Apply the same reasoning to card rewards: take a card for a needed function. Remove cards that have become unnecessary, without prematurely cutting something still doing essential defending or finishing work just to shrink the deck.
Choose by what you enjoy
| Game | Choose it for | Consider before choosing |
|---|---|---|
| Monster Train | For learning to plan cards and a three-floor formation together | A way to read fights, not a maximum-Covenant winning deck |
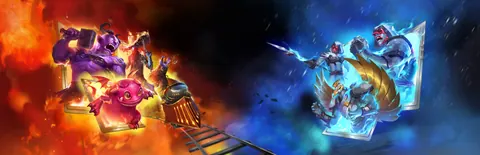
Monster Train
For learning to plan cards and a three-floor formation together
Give your next run an observable task: let your main damage dealer finish its work before the frontline falls. After each play, inspect the preview again. Compare healing, protection, removing an enemy directly and adding damage; which one changes the outcome? Understand that change before deciding what future upgrade you need.
After a loss, note the first failure: not drawn, unaffordable, too large to deploy, or unable to survive. Adjust the next draft or route around one issue so you can tell whether the change helped. Clans and champions alter the details, so this guide does not prescribe one correct sequence for every start.
Start by explaining one turn
Check floor threats, then formation, then resource shortages, then the different demands of waves and Relentless. Explaining why a card helps now is more useful for your next decision than memorizing its name. Mechanics come from the official description and the cross-checked introductory guides below; the exercises are our editorial suggestions, with no win-rate guarantee.
Frequently asked questions
Must I fill all three floors with units?
No. Filling space does not guarantee an effective formation. First keep your core alive and dealing damage, then use other floors according to leaks and enemy abilities. Some builds use several floors; concentrating on one is a learning aid, not a permanent rule.
Does this cover The Last Divinity and Monster Train 2?
It covers the original base game's fundamentals. The Last Divinity's Pact Shards, unit synthesis and associated endgame, and Monster Train 2's new systems, need separate guidance. Do not treat these starting suggestions as a complete guide to those additions.
Sources and scope
Based on the sources below, checked on the dates shown; recommendations about fit are editorial judgments, not a hands-on play report or a difficulty measurement. This guide covers the named games, not their sequels. See each game page for review evidence.
- Shiny Shoe / Good Shepherd Entertainment — Monster Train ↗Checked
- Shiny Shoe / Good Shepherd Entertainment — Monster Train: Verticality ↗Checked
- Dennis / SuperCheats — Keywords and Effects Guide: Relentless, Sweep ↗Checked
- 蜜蜂到底漏不漏 / TapTap — 怪物坐火车反攻天堂?《怪物火车》到底在玩什么 ↗Checked
- てんむす / どすこい一番星 — わかる!Monster Trainの遊び方(その2) ↗Checked